Mindvideo

Video quality guide

What to expect from a mindvideo ai enhancer

A video enhancer is most useful when you can name the flaw you want to fix. Mindvideo offers this guide to help you assess soft detail, noise, and color before choosing an editing workflow.

Check available tools before editing
Mindvideo landing visual illustrating AI video creation

One clear goal for every clip

Start with the viewing problem, not a vague request to make everything sharper. These situations call for different decisions.

Family archivist

An older phone recording looks soft when played on a larger screen. Inspect its original size before assuming extra detail can be recovered.

Aim for a more comfortable viewing experience while preserving familiar faces and the character of the recording.

mindvideo ai image to video

Social video editor

A short clip filmed at dusk has visible grain and uneven lighting. Compare the darkest frame with a well-lit one before changing the whole clip.

Choose a restrained correction that keeps motion believable instead of smoothing away every texture.

mindvideo ai creative studio

Product storyteller

A rotating product shot contains distracting compression blocks around its edges. Look at the source export as well as the edited copy.

Prioritize clean outlines and consistent color over an aggressively sharpened result.

mindvideo ai creative studio

Photo-first creator

A creator has a still portrait but no existing video to repair. Enhancing footage and making motion from a picture are different jobs.

Choose the right starting workflow rather than treating a still image as a damaged clip.

mindvideo ai image to video

Three mechanisms worth checking

An enhancer may address several visible problems, but each adjustment should have a reason.

Assess detail

Pause on a frame with fine edges, such as lettering or hair. Decide whether the source is genuinely blurry or merely displayed at a larger size; sharpening cannot reconstruct detail that was never recorded.

Control noise

Check dark areas and moving subjects for grain, speckles, or compression artifacts. Noise reduction can calm a frame, but too much can erase skin texture and produce a waxy appearance.

Balance the image

Compare exposure and color across the beginning, middle, and end. A correction that flatters one frame may make another look unnatural, so judge the clip in motion.


A step-by-step visual check

Use the same short passage for every comparison so you can spot improvement without guessing.

Mindvideo feature scene used to illustrate reviewing a video source

01

Find the source of the softness

Play the original clip at its intended viewing size. Pause on a face, an edge, and a textured surface, then note whether the issue is focus, motion blur, low resolution, or a compressed export. These causes can look similar in a thumbnail but behave differently during editing.

  • Keep an untouched original for comparison.
  • Judge moving frames as well as still frames.
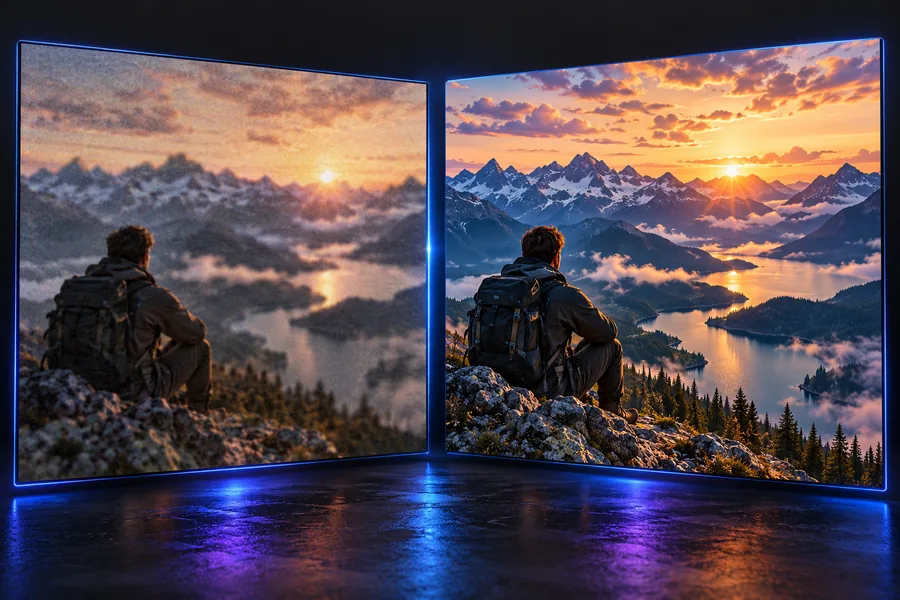
Mindvideo feature scene used to illustrate comparing video results

02

Compare a restrained result

After testing an available edit, watch the original and revised versions at the same size. Look closely at eyes, text, and object boundaries. If outlines glow or surfaces become unnaturally smooth, the apparent sharpness may be an artifact rather than a useful improvement.

  • Check the full clip for flicker.
  • Prefer consistent frames over a striking preview.

Step-by-step choices by source

The best first check depends on how the footage was captured.

Watch the shadows first

In dark clips, compare shadow texture and facial detail before and after an edit. Brightening can reveal noise that was less noticeable in the original, while strong smoothing can remove useful detail.

  • Inspect both static and moving subjects.
  • Check whether color shifts between shots.

Separate blocks from blur

Messaging and repeated exports can leave blocky edges even when the camera focused correctly. If you still have the camera original, compare it with the shared version before attempting an enhancement.

  • Start from the least-compressed copy available.
  • Inspect text and high-contrast edges.

Respect the source

A small or interlaced recording may look rough on a modern display. A pleasant result does not require inventing crisp texture everywhere; stable motion and recognizable features matter more.

  • Keep a copy of the original recording.
  • Check faces frame by frame.

Limits and edges

No enhancement workflow can guarantee that damaged or missing visual information will return.

Lost detail stays uncertain

Severe defocus, tiny source dimensions, and heavy compression can remove information altogether. An enhanced-looking edge is not proof that the original detail has been recovered.

WorkaroundUse the highest-quality original you have and evaluate the result at its intended viewing size.

Motion can expose artifacts

A single corrected frame may look convincing while playback reveals flicker, halos, or changing facial features.

WorkaroundReview a passage with movement, not just a preview frame.

Access and controls may differ

This guide does not establish which enhancement controls, input types, or export options are available after the /go handoff.

WorkaroundConfirm the current tools and requirements at the destination before preparing a project around them.

Take a measured next step

Start with one clip and one visible issue

Choose a short representative passage, keep the original, and describe the change you want. Mindvideo recommends checking the destination's available tools before committing to a longer edit.

  • Name the flaw before editing
  • Compare at the same viewing size
  • Review the result in motion

Mindvideo enhancer FAQ

Enhancement generally aims to make footage easier to watch by addressing issues such as noise, softness, or uneven tone. The available controls depend on the tool, and improvement should be judged against the original clip.

It may make some edges appear clearer, but it cannot reliably restore information that the camera did not capture. Severe defocus and motion blur are especially difficult to correct without visible artifacts.

Strong sharpening can create bright outlines, while heavy noise reduction can flatten skin and other textures. Compare moving footage at a consistent viewing size to see whether the change actually helps.

A photo and an existing video have different starting points. If your goal is to create movement from a still picture, look for an image-to-video workflow rather than a video-repair workflow.

Pick a short section that contains the problem you care about, plus movement and fine detail. Keep the original so you can compare both versions without relying on memory.

Start creating
Start creating